


Hey there! As a supplier of Honeywell Intermec printheads, I've seen firsthand how important it is to keep these printheads clean. A dirty printhead can lead to all sorts of issues, like poor print quality, streaks, and even complete print failures. In this blog post, I'm going to walk you through the process of cleaning the contacts of a Honeywell Intermec printhead, step by step.
Why Clean the Printhead Contacts?
Before we dive into the cleaning process, let's talk about why it's so important to clean the contacts of your Honeywell Intermec printhead. Over time, dust, debris, and ink residue can build up on the printhead contacts. This buildup can interfere with the electrical connection between the printhead and the printer, causing poor print quality and other issues. By cleaning the contacts regularly, you can ensure that your printhead is functioning at its best and that you're getting the highest quality prints possible.
What You'll Need
To clean the contacts of your Honeywell Intermec printhead, you'll need a few supplies:
- Isopropyl alcohol (at least 90% pure)
- Lint-free cleaning swabs or cotton balls
- A clean, dry cloth
- A small, flat-tip screwdriver (if necessary)
Step 1: Turn Off the Printer
Before you start cleaning the printhead contacts, it's important to turn off the printer and unplug it from the power source. This will help prevent any electrical shocks and ensure that you're working safely.
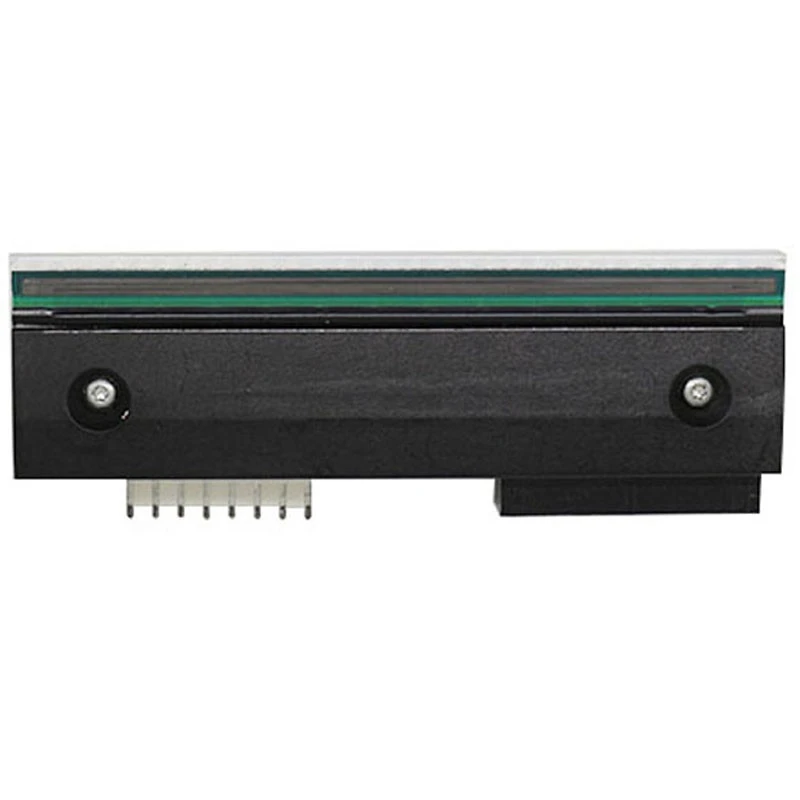

Step 2: Access the Printhead
The next step is to access the printhead. The process for accessing the printhead will vary depending on the model of your Honeywell Intermec printer. In some cases, you may need to remove a cover or panel to access the printhead. In other cases, you may be able to access the printhead by opening the printer's media compartment. Refer to your printer's user manual for specific instructions on how to access the printhead.
Step 3: Locate the Printhead Contacts
Once you've accessed the printhead, you'll need to locate the contacts. The contacts are usually located on the back or side of the printhead and are made up of small, metal pins or pads. They may be covered by a protective shield or cap, so you may need to remove this to access the contacts.
Step 4: Clean the Contacts
Now it's time to clean the contacts. Dip a lint-free cleaning swab or cotton ball into the isopropyl alcohol and gently wipe the contacts. Be sure to apply enough pressure to remove any dirt or debris, but be careful not to damage the contacts. You may need to use multiple swabs or cotton balls to clean the contacts thoroughly.
Step 5: Dry the Contacts
After you've cleaned the contacts, use a clean, dry cloth to dry them. Make sure that the contacts are completely dry before you reassemble the printer.
Step 6: Reassemble the Printer
Once the contacts are dry, you can reassemble the printer. Replace any covers or panels that you removed to access the printhead, and make sure that everything is securely in place.
Step 7: Test the Printer
After you've reassembled the printer, plug it back in and turn it on. Print a test page to make sure that the printhead is functioning properly. If you're still experiencing issues with print quality, you may need to repeat the cleaning process or contact a professional printer technician for further assistance.
Tips for Maintaining Your Printhead
In addition to cleaning the contacts regularly, there are a few other things you can do to maintain your Honeywell Intermec printhead and ensure that it's functioning at its best:
- Use high-quality print media: Using low-quality print media can cause ink to smear and build up on the printhead, leading to poor print quality and other issues. Make sure that you're using high-quality print media that is compatible with your printer.
- Keep the printer clean: Regularly clean the printer's interior and exterior to remove dust and debris. This will help prevent dust and debris from building up on the printhead and causing issues.
- Replace the printhead when necessary: Over time, the printhead will wear out and need to be replaced. Refer to your printer's user manual for specific instructions on when to replace the printhead.
Conclusion
Cleaning the contacts of your Honeywell Intermec printhead is an important part of maintaining your printer and ensuring that you're getting the highest quality prints possible. By following the steps outlined in this blog post and using the tips for maintaining your printhead, you can keep your printhead functioning at its best and avoid costly repairs and replacements.
If you're in the market for a new Honeywell Intermec printhead, we've got you covered. We offer a wide range of Honeywell PM42 PM43 203dpi 300dpi Printhead, Honeywell PF4I PM4IA PF4CI PM4 PF4IB PF4IC Printhead, and Intermec 4420 063716s-001 Printhead to meet your needs. Contact us today to learn more about our products and to discuss your specific requirements. We're here to help you find the perfect printhead for your printer and to ensure that you're getting the best possible value for your money.
References
- Honeywell Intermec Printer User Manuals
- Printer Maintenance Guides and Resources


